The path to an Ubiquiti home network Part 1
Unifi Cloud Key
Posted: 03 Jan 2019
Last Modified: 03 March 2019
The path to an Ubiquiti home network Part 1 Unifi Cloud Key (this post)
The path to an Ubiquiti home network Part 2 Unifi Access Point
The path to an Ubiquiti home network Part 3 Create Wireless Network
Quick Links
- Why Ubiquiti?
- Unifi Cloud Key
- Useful links
Why Ubiquiti?
The lead up to using Ubiquiti Unifi devices started when I wanted a more stable/reliable router and a bit of analytics. This was accomplished by using custom firmware (in my case the Tomato Firmware) on a WRT54GL Linksys Router.
Some time later it was time to upgrade hardware (mostly due to get 802.11n/5GHz wireless) and I wanted to see what the devices on my network were doing, so I replaced the WRT54GL Linksys Router with an ASUS RT-N66U running Toastman Tomato Firmware.
Recently I had been hearing more about Ubiquiti and came across Scott Helme’s My Ubiquiti Home Network post which gave me the push to use Unifi for my home network. Unifi is the next evolution on from what Toastman Tomato Firmware provided. The interfaces looked nice, lots of stats, easy maintenance, remote administration and other benefits I have probably yet to discover.
I see Unifi as enterprise level features and hardware with consumer level pricing.
Unifi Cloud Key
What is Unifi?
Unifi is a range of networking products made by Ubiquiti Networks.
What is a Unifi Cloud Key?
The Unifi Cloud Key is a Unifi SDN Controller which manages Unifi devices on your network. It is possible to install Unifi SDN Controller Software on your own hardware, instead of using an Unifi Cloud Key, should you so wish.
A Unifi SDN Controller has a nice web interface to manage all of the adopted Unifi devices on your network.
Why use the Unifi Cloud Key?
The cost of the Unifi Cloud Key is close to the cost of buying my own hardware to do the same job. I did not feel that it was worth the time and effort of getting a raspberry pi and setting it all up when it is much quicker and easier using an Unifi Cloud Key.
Setting up Unifi Cloud Key
Prerequisites
- Unifi Cloud Key
- Ethernet Cable (comes with retail Unifi Cloud Key purchase)
- microSD Card (comes with retail Unifi Cloud Key purchase)
- USB C power source (only required if PoE is not being used)
- Web Browser - Google Chrome (separate instructions for other web browsers are available in the Quick Start Guide)
- DHCP enabled network (so that the Unifi Cloud Key is able to get an ip address)
microSD Card
The microSD card is used to store configuration backups of the Unifi Cloud Key.
Cloud Key (bottom panel)
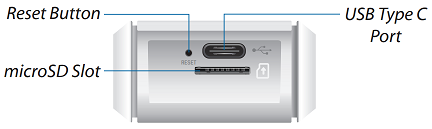
Insert the microSD, that came with the cloud key, into the microSD slot on the bottom panel of the cloud key.
Power the Cloud Key
There are two options for powering the Cloud Key, either is fine to use.
PoE
Switches that are 802.3af/at / PoE compliant can power the cloud key. Simply connect the supplied Ethernet Cable to the Cloud Key and to a PoE enabled port on the switch. Please note that not all ports on a 802.3af/at / PoE compliant switch are necessarily PoE capable and that PoE may need to be manually enabled.
Ubiquiti do make switches that have PoE ports which will be covered later in this post series.
Knowledge Bite
Power over Ethernet (PoE / 802.3af/at) is a technology that provides power over a twister pair Ethernet Cable. There is a limit to the power that can be supplied, however low power devices such as the Cloud Key, IP Cameras, Wireless Access Points, Desk Phones, etc… can be powered using PoE.
USB-C
A common way is to use a mobile phone charger (5V, minimum 1A) that has a USB-A socket with an USB-A to USB-C cable. Another option would be to use a mains power adaptor (5V, minimum 1A) that has a USB-C connector.
Knowledge Bite
USB-C is a newer usb connector type released in 2014. One of the main differences is that it does not matter which way round the connector is plugged in. The connector shape is a rectangle with the short sides being curved. Many newer phones have it such as: Samsung Galaxy S9, Google Pixel 3, Razer Phone 2, LG G7 ThinQ, Huawei Mate 20 Pro etc…
LED Status Meaning
| LED Color | Status |
|---|---|
| White | Factory defaults |
| Flashing White | Initializing |
| Alternating White/Blue | Device is busy; do not touch or unplug it. This usually indicates that a process such as a firmware upgrade is taking place. |
| Blue | Device is working properly |
During the power on process I observed the following:
- Cloud Key was given power
- After ~3-5 seconds the LED started to flash White
- After another ~2-3 seconds the LED started to flash White faster
- After another 10-15 seconds the LED stopped flashing and stayed White*
* According to the table above, white just means ‘Factory Defaults’. From a users perspective it would be nice to have an indication if the Cloud Key is trying to get an IP Address via DHCP for trouble shooting purposes.
Knowledge Bite
Dynamic Host Configuration Protocol (DHCP) is a network management protocol that dynamically (on demand) assigns ip addresses to devices. This is the technology that gives your laptop, desktop, mobile etc.. an ip address so that it can access the internet.
UBNT online account
The UBNT online account provides internet access to the Cloud Key and thus all of its the adopted devices.
When it is stated that an ubiquiti device is adopted this means that an ubiquiti device is assigned to a UBNT account or unifi controller such that it can be managed.
For the purposes of setting up the Cloud Key, the UBNT online account (through the use of a chrome plugin) also provides the ability to detect ubiquiti devices.
Create UBNT online account
Knowledge Bite
I’ll take the opportunity here to stress the importance of password best practice. Many people re-use the same password for multiple online accounts. It is understandable why people do this, as it is hard to remember lots of different passwords.
This a really bad idea because of credential stuffing. (when a site you have an account on is hacked such that your username, email, password etc.. are compromised, your password from that hack site is used to try and gain access to your other online accounts).
Another big problem is humans like passwords that are easy to remember which can lead to poor password choice if not chosen carefully. Many of these passwords which are easy to remember are well known to attackers or are susceptible enough to brute force attacks.
There have been so many breaches in recent years that a service was created, called haveibeenpwned.com, to alert people, who sign up for alerts, if their email address appears in a data breach.
This is where password managers come in. You remember just one password and it generates unique secure passwords for every account. Read more about password managers over at eff.org. As a side note you can use haveibeenpwned.com which is a public service that allows people to check if thier email address appears in a breach, of a compaines data, that has been indexed by haveibeenpwned.com.
To further protected your online accounts consider using Multi Factor Authentication (MFA) (Two-Factor authentication (2FA) is a form of MFA) where available.
Goto https://unifi.ubnt.com/ in Google Chrome (it will most likely redirect to something like https://account.ubnt.com/login?redirect=https%3A%2F%2Funifi.ubnt.com%2F which is fine) and create an account.
Once you have successfully created an account you should still be logged in and see something similar to the below

The demo account is exactly that. It can be used to see what it is like to have several devices to manage, what stats are generated etc…
Discover Cloud Key
In the Unifi Cloud Key quick start guide it does say “Ensure that your host system is on the same Layer-2 network as the UniFi Cloud Key”.
Knowledge Bite
Layer-2 is the Data link layer of the OSI model. This is the layer of the MAC Address (before ip addresses come into play). As you are the one setting up the Unifi Cloud Key then you are probably the network administrator and will probably know if you have multiple Layer-2 networks or not. If you are the network administrator but don’t know if you have multiple Layer-2 networks then it is probably safe to assume all your devices are on the same Layer-2 network.
In the middle at the top of the page you will see that Discover Cloud Key is OFF.

Enable the Discover Cloud Key option by clicking the slide switch
 just to the right.
Knowledge Bite
Be careful with which browser extensions/apps you do choose to install. They can be hacked, purchased and abandoned to add malware and or adware for example. Check the permissions of extensions/apps before you install them. If you have extensions installed that you no longer use, consider disabling them or removing them.
Information Security Investigative Reporter Brain Krebs says “At the very least, do not agree to update an extension if it suddenly requests more permissions than a previous version. This should be a giant red flag that something is not right.”
If you prefer not to install the extension please see the “Instructions for Other Web Browsers” in the official Unifi Cloud Key quick start guide on page 15, otherwise let’s continue.
If the Ubiquiti Device Discovery Tool is not already installed you will be asked to install it.

Click ‘INSTALL’.
Chrome will ask if you want to install.
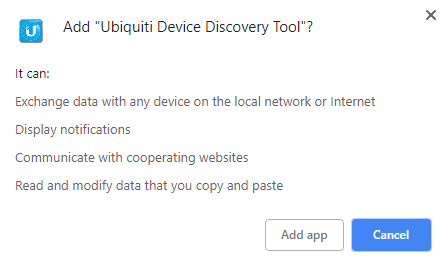
Click ‘Add app’.
You should then be back at unifi.ubnt.com and have your cloud key showing up. In the image below it has the name Unifi CloudKey v3

Click Adopt
If the Cloud Key firmware is not up to date then you should be prompted to upgrade it
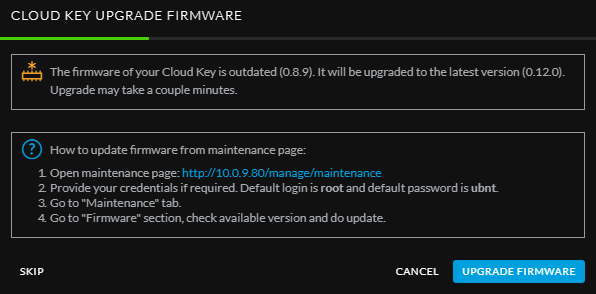
Click UPGRADE FIRMWARE
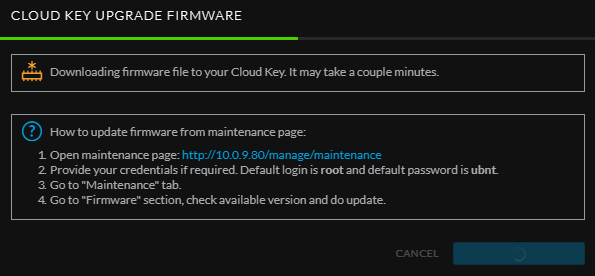
This can take a while as the Unifi Cloud Key will first download the firmware and then upgrade itself.
Once the upgrade is complete you should then be prompted to open the controller wizard
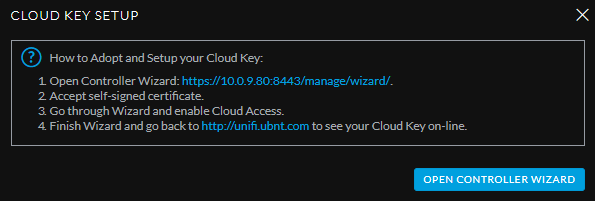
Click OPEN CONTROLLER WIZARD
UniFi Setup Wizard
Knowledge Bite
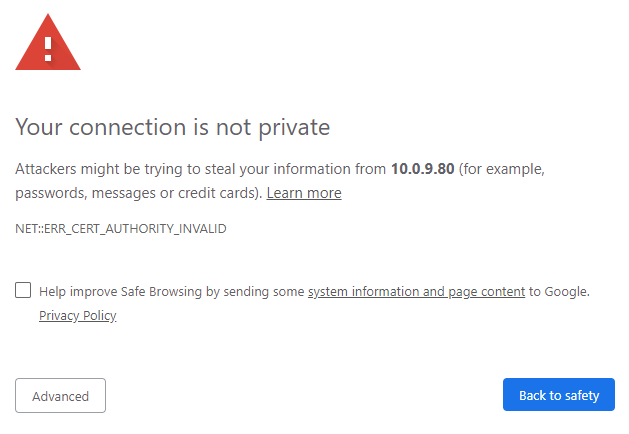
When you see a ‘Your connection is not private’ in chrome, ‘Your connection is not secure’ in firefox, ‘This site is not secure’ in Internet Explorer and similar messages in other browsers this means there is a problem. There are many variations of what causes this end result (including malicious activity). The default behaviour when seeing this type of message is not trying to bypass this message to get access to the site but to try and alert those who are responsible for the website and hold tight until the issue is resolved.
The specific cause for the ‘Your connection is not private’ here is that the cloud key is using a self signed certificate, the reasons for which are quite technical and I won’t go into here (normal websites should never be using self signed certificates). Certificates are bound to what are known as certificate authorities. Browsers have a specific list of approved certificate authorities. It is not possible for self signed certificates to be bound to one of these approved certificate authorities and thus we have this ‘Your connection is not private’ presented when accessing the cloud key.
As this is a very specific case where it is understood why it is ok to bypass the
Your connection is not private warning, go ahead and click Advanced.
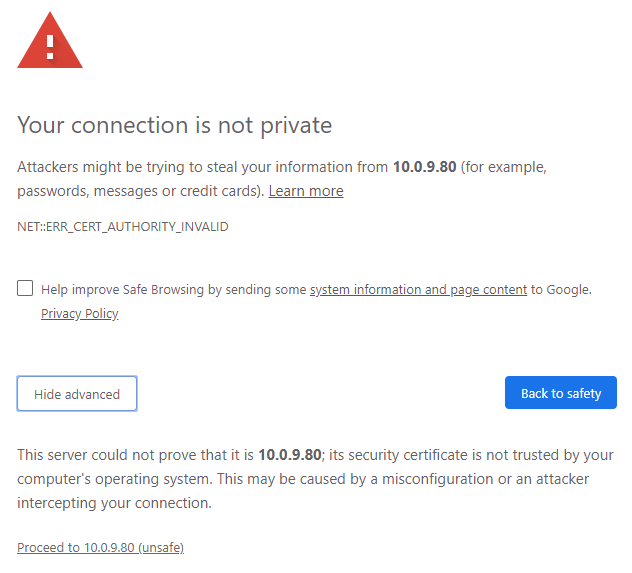
Click Proceed to ….
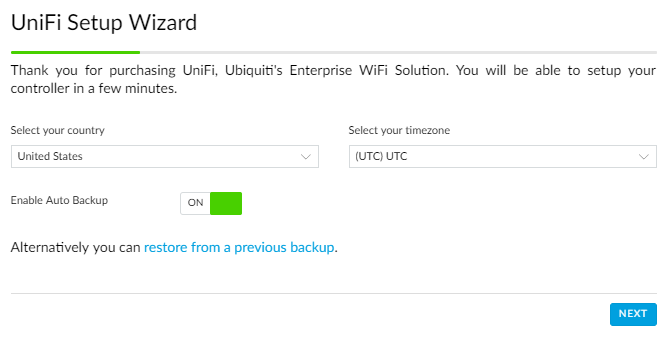
Select the the desired country and timezone then click NEXT
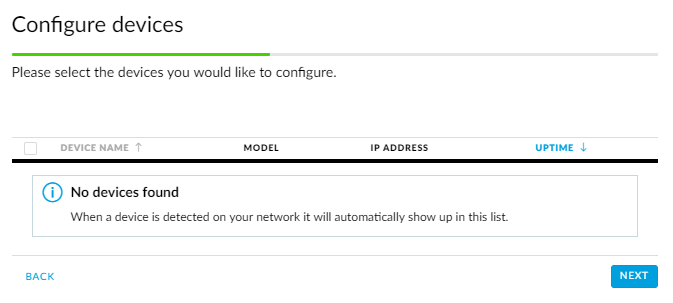
I deliberately had no other Unifi devices connected to my network for this post which is why it says No devices found.
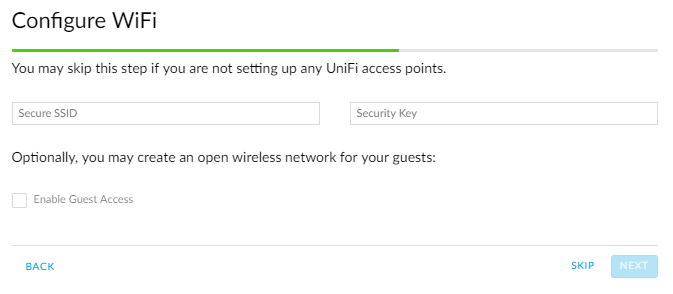
I clicked skip on Configure WiFi as I will be doing this in the Access point post.
Credentials
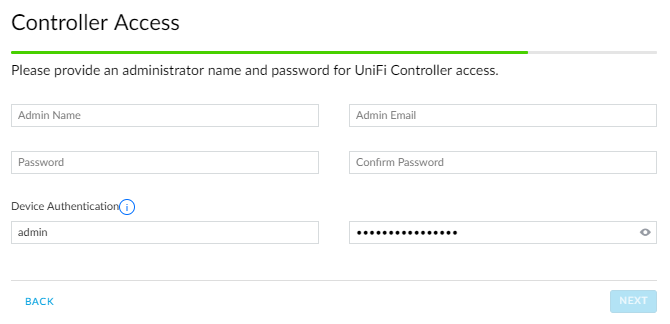
It can be somewhat confusing why it is asking for you to create several sets of credentials.
Controller Access - Credentials to access to management interface to manage all you Unifi devices.
Device Authentication - Credentials for all your Unifi devices. There is a random password automatically generated so you can leave this section as it is if you wish. I am guessing that when devices are adopted they will use this username and password so that there is not a commonly known set of default credentials that would allow anyone, with network access to these devices, to gain control of them.
SSH - Credentials to SSH into Unifi devices. The default is to use the same credentials as is used for Device Authentication. If you wish to use different credentials untick ‘Use the same name and password for SSH access to your Cloud Key.’ (which appears when the Controller Access credentials have been filled in) and enter the desired SSH username and password.
Enter the details required.
When storing passwords for later use make sure to do so securely, for example in a password manager.
Click Next.
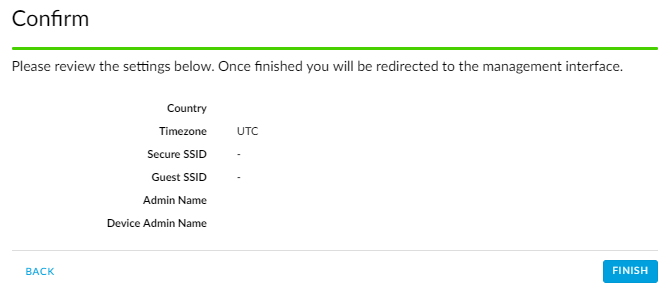
Verify the details are correct and click FINISH.
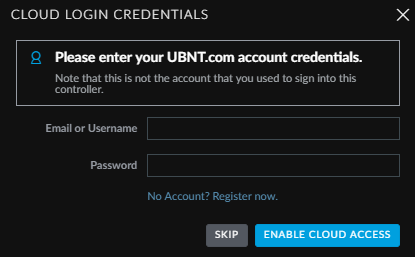
Enter your UBNT online account credentials here and click ENABLE CLOUD ACCESS if you would like to be able to remotely (via the internet) administer you network via the Cloud Key, otherwise click SKIP.
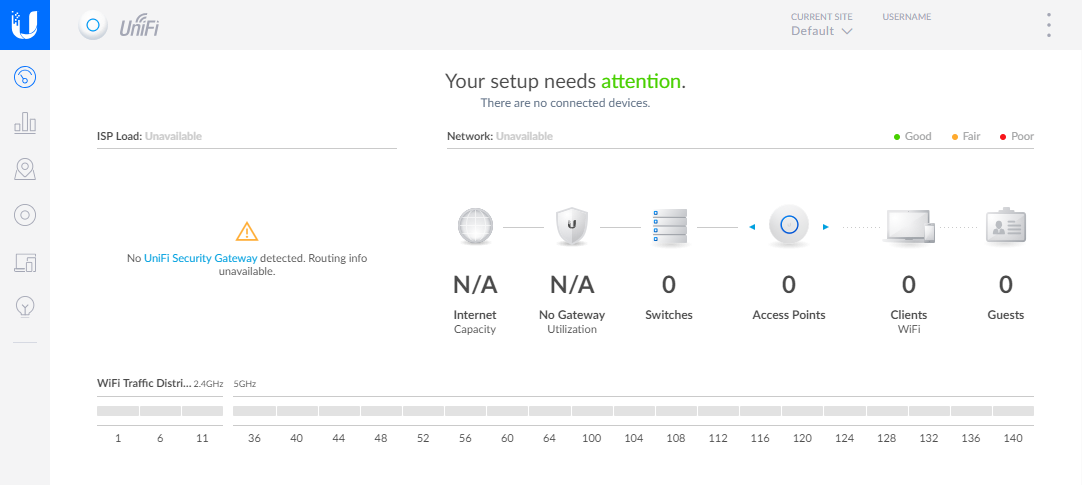
Congratulations you have successfully setup your Unifi Cloud Key. You should see similar to the below.
Changing the default Unifi Cloud Key device password
Login to unifi.ubnt.com and find the IP Address of your Unifi Cloud Key.

The IP Address of the Unifi Cloud Key in the above image is 10.0.9.80 your’s will be different most likely (10.x.x.x or 192.168.x.x or 172.16.x.x).
In your web browser enter the url https://<ip-address> where <ip-address> is the IP Address of your Unifi Cloud Key. Using the above image as an example the url would be https://10.0.9.80
You may to see the Your connection is not private again. As this is a very specific case where it is
understood why it is ok to bypass this Your connection is not private warning go ahead and click
Advanced then Proceed to...
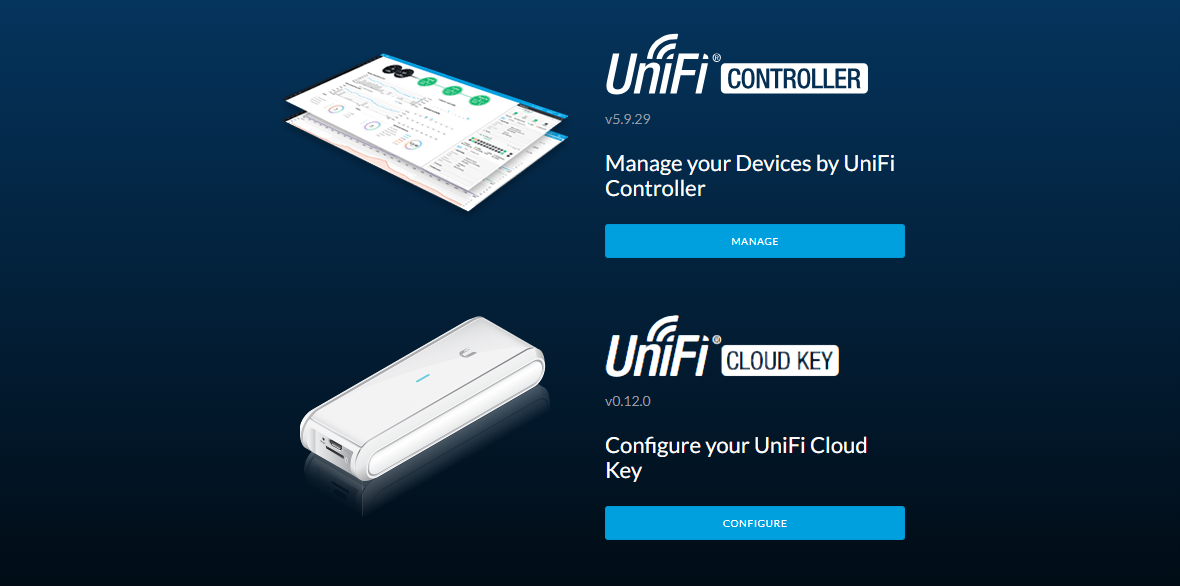
Manage will take you to the interface to manage your Unifi Devices and Configure will allow you to manage the Unifi Cloud Key itself.
Click Configure.
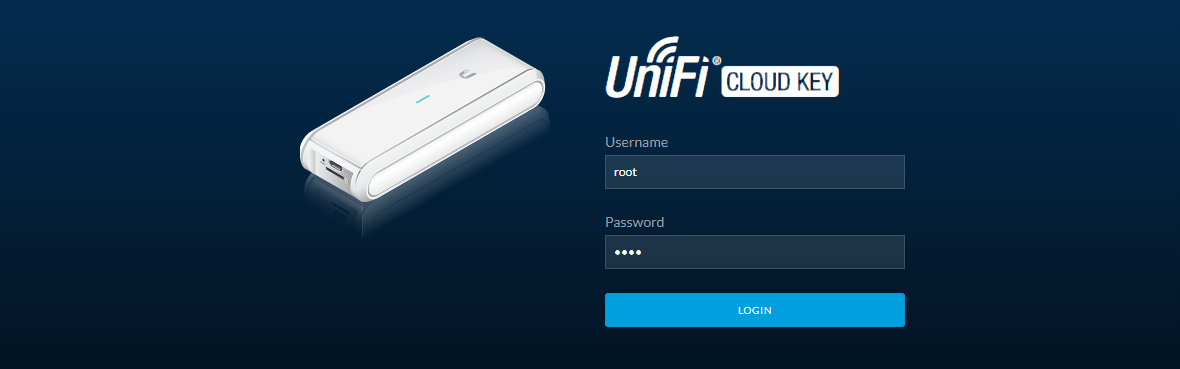
Enter the default credentials, which should be the one in the table below, then click Login.
| Username | Password |
|---|---|
| root | ubnt |
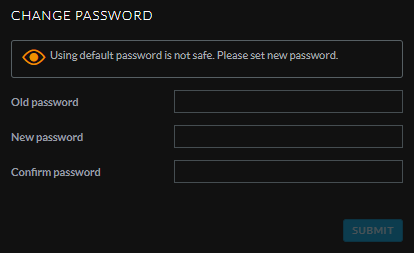
You will be asked to change the default password. When storing passwords for later use make sure to do so securely,
for example in a password manager.
Use your own certificate on the cloud key
For those who are interested in using their own certificates with the Unifi Cloud Key, head over to Scott Helme’s blog Setting up HTTPS on the UniFi CloudKey.
Next up: Part 2 - Unifi Access Point.