The path to an Ubiquiti home network Part 2
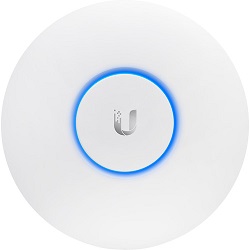
Unifi Access Point
Posted: 03 March 2019
Last Modified: 03 March 2019
The path to an Ubiquiti home network Part 1 Unifi Cloud Key
The path to an Ubiquiti home network Part 2 Unifi Access Point (this post)
The path to an Ubiquiti home network Part 3 Create Wireless Network
Quick Links
The following is using a retail Unifi-AP-AC-Lite. The other Unifi Access Points should follow a very similar procedure. This page shows PoE Input Methods Supported for Unifi devices.
Unifi Access Point
Power the Unifi Access Point
A PoE injector comes with the access point used for powering and connecting the access point the the network. There are two RJ45 sockets one labeled POE and the other LAN. The POE socket provides power and data whereas the LAN socket provides only data.
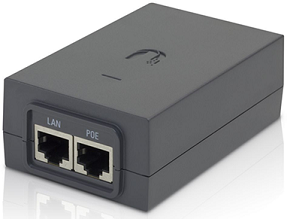
Using a Cat5e ‘ethernet’ cable plug one end into the POE socket on the PoE injector (pictured above), and the other end into the RJ45 socket on the Unifi Access Point. If there are two RJ45 sockets on the Unifi Access Point use the one labeled Main.
Knowledge Bite
Power over Ethernet (PoE / 802.3af/at) is a technology that provides power over a twister pair Ethernet Cable. There is a limit to the power that can be supplied, however low power devices such as the Cloud Key, IP Cameras, Wireless Access Points, Desk Phones, etc… can be powered using PoE.
Using another Cat5e ‘ethernet’ cable plug one end into the LAN socket on the PoE injector (pictured above), and the other end into your switch (which has a DHCP server accessible).
Knowledge Bite
Dynamic Host Configuration Protocol (DHCP) is a network management protocol that dynamically (on demand) assigns ip addresses to devices. This is the technology that gives your laptop, desktop, mobile etc.. an ip address so that it can access the internet.
Power the PoE injector using the supplied mains cable.
The Unifi Access Point’s led should now be on and the colour white.
Adopt Access Point
Using your web browser, login to your ubnt.unfi.com account and click launch on your cloud key or login to the
CloudKey/Unifi SDN Controller via its ip address in a web browser.

On the left menu bar click devices denoted by the image 
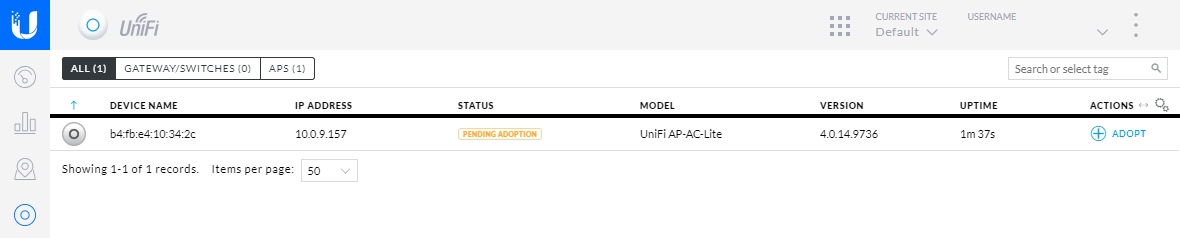
There should be a new device which says Pending Adoption. If there is an upgrade available Upgrade can be seen next to adoption. If this is present click Upgrade.
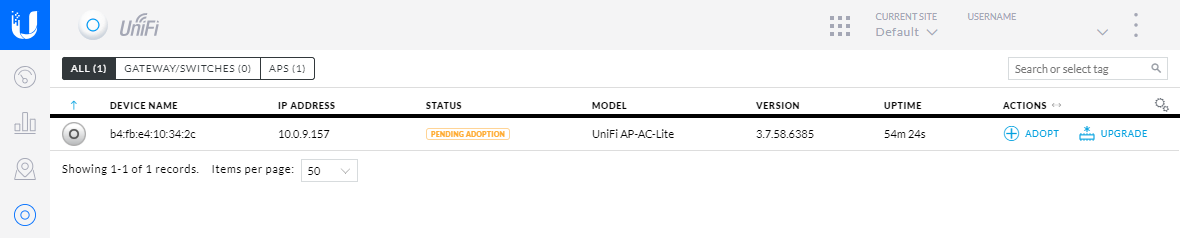
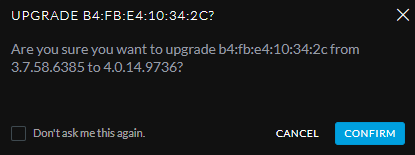
A message will appear asking for conformation to upgrade the device. Click Confirm.
Updating should now been seen where Upgrade was seen and status should be Updating. Wait for the upgrade to finish (should not take too long with a decent internet connection).

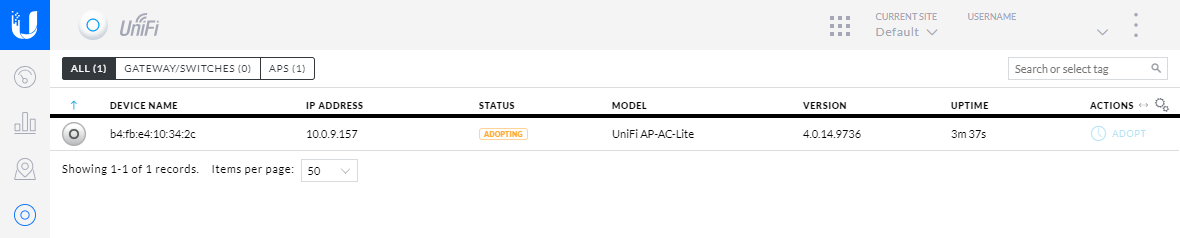
Once the upgrade has completed, Adopt should now be seen where Updating was seen. Click Adopt.
Status should now be Adopting.
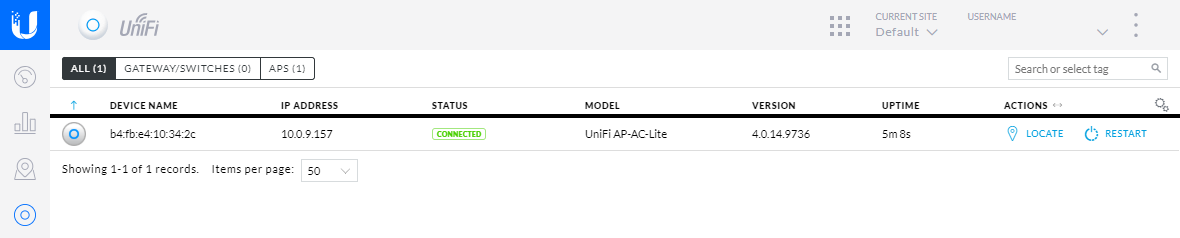
After adoption has completed status should be Connected. Congratulations you have successfully adopted a Unifi device to your Uifi network.
Next up: Part 3 - Creating a wireless network.